
A Brief Overview of Extract Homebrewing
Posted by Grange Co-op on 4th Jan 2016
 Interested in trying your hand at brewing your own beer? You’re not alone. In 2012, the American Homebrewers Association estimated there were over 1 million homebrewers in the U.S., and the number is climbing quickly. Homebrewing is fun, relatively easy to get started, environmentally friendly, and allows you, the brewer, to be creative and craft beverages to your own specific tastes.
This is a very simple overview of the process of malt extract brewing; this article will not teach you how to brew beer. Be sure to follow all directions on your homebrew kit. Most first-time brewers start with a malt extract recipe. It requires less equipment and fewer steps than other brewing recipes, yet [clear] still produces a quality, homebrewed beer.
There are 3 primary sections to the malt extract homebrewing process:
- Brew Day
- Fermentation
- Bottling or Kegging
 Brew Day
Brewing can only begin once you've gathered all equipment and ingredients and completed the necessary cleaning and sanitizing. Many homebrewers cite sanitation as the most important part of homebrewing. Any debris can harbor unwanted yeast or microbes that may contaminate your beer. It’s a good idea to read through the complete directions on your kit BEFORE your brew day, to be certain you have all the equipment and ingredients you need and can estimate how much time is required.
Brew Day
Brewing can only begin once you've gathered all equipment and ingredients and completed the necessary cleaning and sanitizing. Many homebrewers cite sanitation as the most important part of homebrewing. Any debris can harbor unwanted yeast or microbes that may contaminate your beer. It’s a good idea to read through the complete directions on your kit BEFORE your brew day, to be certain you have all the equipment and ingredients you need and can estimate how much time is required.
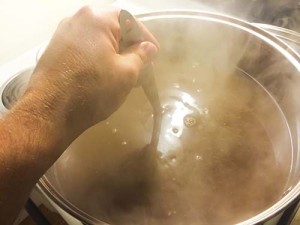
Once everything is ready, your brew day will consist of soaking malted barley in hot water to release the malt sugars, then boiling the malt sugar solution with hops for seasoning. You’ll allow the solution to cool and add yeast to begin fermentation. Finally, you’ll transfer the solution, now called wort, to your fermenter and find a good place to store it for the next part of the process.
 Fermentation
After your brew day, your beer will need to ferment for 1 – 2 weeks. Homebrewing is a good way to learn patience! You’ll want to store your fermenter somewhere with steady temperatures. Your brew kit directions will give you a range of optimal temperatures.
Fermentation
After your brew day, your beer will need to ferment for 1 – 2 weeks. Homebrewing is a good way to learn patience! You’ll want to store your fermenter somewhere with steady temperatures. Your brew kit directions will give you a range of optimal temperatures.
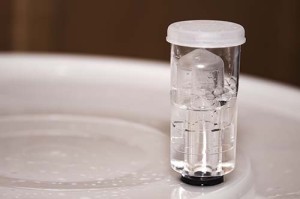
During fermentation, the yeast is fermenting the sugars, releasing CO2 and ethyl alcohol. Bubbling at the fermenter’s airlock or frothy foam on top of the wort are visible signs of fermentation. Typically, fermentation takes 7-10 days, and you can bottle or keg your beer after 14 – 28 days.

Bottling or Kegging Most first-time brewers bottle their beer, since it’s easier and, at least up front, less expensive than kegging. Before bottling, you will add a little bit of fermentable sugar to the beer. This step is called priming. It allows the yeast to convert to CO2, and is what actually carbonates the beer.
After priming, you’ll carefully siphon the beer from the fermenter into a cleaned and sanitized bottling bucket with an attached spigot and bottle filler. Once you fill the bottles, you’ll cap them with a sanitized capper, and store them at room temperature for 2-3 weeks to allow the beer time to carbonate.
Finally, it will be time to chill, open and take your first taste of beer you brewed yourself.